Actioning selected records
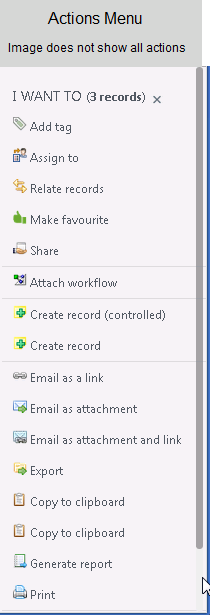
The following actions may be available from the actions menu when you have one or more records selected provided the actions have been enabled by your RM Workspace administrator and that you have the appropriate access permissions and HP TRIM/HPE RM security profile.
To preview the attachment of a record, simply click on the record's title. It does not need to be selected prior.
You may need to scroll down the actions menu to view additional actions further down the list. The actions menu offers its own scroll bar (if necessary) just to the right of the action items when your cursor is in the actions menu..
Note: Generic action terms are used in this document. Your RM Workspace administrator may have changed some action names to suit your organisation's terminology.
Actions listed below have been displayed alphabetically for ease of reference.
Select one or more records by ticking the select box associated to the record(s) and then in the actions menu, click on ......
Assign to
To set the assignee field of the record(s) to a location value you select from a pick list.
Note: Records which are assigned to you will be displayed in the 'Assigned to Me' portlet on your home screen.
Checkout/checkin
To check the selected record(s) in or out of HP TRIM/HPE RM.
These options are only available for multiple record selection if the selected records are in the same state. e.g.: With 1 x checked out record and 1 x checked in record selected, neither the checkout nor checkin actions will be available in the menu.
-
If 1 or more checked in records are selected, then the actions menu will offer the checkout option
-
If 1 or more checked out (to you) records are selected, then the actions menu will offer the checkin option.
If you have selected a record to which you do not have the appropriate access permissions (eg: 'View document' or 'Update document'), then these options will not be available in the actions menu
Copy details to clipboard
To copy the details of the selected record(s) to the clipboard so that you can paste the record number and name of the selected record(s) into another application.
The pasted record detail includes a hyperlink for each selected record, which when clicked, searches for and displays that record in RM Workspace.
Copy link to clipboard
To copy the record number(s) only of the selected record(s) to the clipboard so that you can paste a single hyperlinked value into another application.
The pasted value is hyperlinked such that, when clicked, RM Workspaces opens a new instance then searches for and displays all the represented record(s).
Create contained record
With a single container behaviour record selected, in addition to 'Create record', you may also have the option to 'Create contained record'. When this is selected, the new record process is initiated and the selected container record details are automatically applied to the new record.
Create part
To create a new part to the selected record.
This option is only available if the selected record is of a type which allows parts and you are authorised to create parts.
Create PDF Rendition
To add the record to the HP Renderer queue in order to create a PDF rendition to be attached to the record.
The HP Renderer must be installed, licenced and operational for the rendition request to be processed.
Create version
To create a new version of the selected record(s)
This option is only available if the selected record is a type which allows versions and you are authorised to create them.
Delete record
To mark the selected record(s) for deletion by your HP TRIM/HPE RM administrator.
This action hides the record from view by changing the access control 'View metadata' for the selected record(s) to a location defined by your RM Workspace administrator in RM Workspace's configuration settings.
Records marked for deletion will be processed for deletion/destruction by your HP TRIM/HPE RM administrator at a later date.
Email as a link
To create a new email message with the selected record(s) attached as .tr5 links. Clicking on a .tr5 link in the attachment field in your email will display the linked record in RM Workspace.
Note: For .tr5 file extension type files to be displayed in RM Workspace when clicked, requires Portal Launcher to be installed on your computer. Also, .tr5 file extension files need to be associated with Portal Launcher in your computer's default extension associations.
Email as attachment
To create a new email message with the record's file included in the email as an attachment.
Email as link and attachment
To create a new email message with the selected record attached as a.tr5 link and the record's file included in the email as an attachment.
Export
To export the selected record(s) to a designated location (usually your 'My Documents' directory).
Favourites - Make favourite/Remove from favourites
To add or remove the selected record(s) to/from your Favourites list.
Your favourite records can be viewed from the Home screen Favourites portlet or from the My Favourites link in the left side navigation bar.
You can also add a record to or remove it from your favourites by clicking the record's star icon
Finalise
To finalise the selected record(s), preventing any further editing from being done.
Modify notes
To add notes to the selected record together with a user stamp and the current date/time.
Print
To print the selected record(s) attached files on your default printer.
This option is only available where the selected record(s) have electronic attachments.
Relate records
To create a relationship between 2 or more selected records.
At least 2 records must be selected in order to view this option and you must be authorised to create relationships
Request record
To create a request for physical (paper) record(s) to be provided to you by a specified date in the future.
This option is only available if the record type allows requests and you are authorised to make requests.
This is applicable only to container type records
Send to report
To send the data from the selected record(s) to one of HP TRIM/HPE RM’s standard reports. Select the desired report from the list of available reports and the report will print on your default printer.
Share
To share the selected record(s) with one or more users or groups.
Records you share with others and those which other users share with you, are available from the appropriate links in the '
Collaboration' section in the left side navigation bar.
Show audit history
To display all active audit events recorded for the selected record.
Show client record
With a Client matter selected, use this option to search for and display the appropriate client record.
Show client's matters
With a Client record selected, use this option to search for and display the Client matter(s) appropriate to the selected record.
Show client matter
With a Matter record selected, use this option to search for and display the Client matter appropriate to the selected record.
Show container
To display the container of the selected record.
This option is only available when the selected record has a container.
Show contents
To display all of the records contained within the selected container record.
This option is only available when the selected record is a container type record and it contains records.
Show matter records
With a Client matter selected, use this option to search for and display the appropriate Matter record(s).
Show parts
To display all parts of the selected record.
This option is only available when the selected record contributes to a parts set.
Show related records
To display a list of records related to the selected record.
This option is only available where the selected record has a relationship with at least one other record.
Show versions
To display a list of all versions of the selected record.
This option is only available where the selected record is a version.
Tag
To create a new tag or select an existing tag and to apply it to the selected record(s)
Update document
Enables you to update a record’s file attachment, replacing the existing file with another file you select via Windows Explorer, creating a new revision (if revisions are switched on in HP TRIM/HPE RM)
The selected record must be checked in or if checked out, may only be checked out to you.
View properties
To view the HP TRIM/HPE RM properties window for the selected record.
Note: You can also see a summary of the record's metadata in the details pane.
Workflow - Attach workflow
To attach a workflow action to the record(s), selected from a list of available workflow action procedures.
Records which have a current workflow action assigned to you will be displayed on your Home screen in your 'My workflows' portlet.
Workflow - Complete workflow action
To mark the current workflow step complete on the selected record(s)
This option is available only if the selected record has a workflow action and you are authorised to update the workflow step.
You can also complete a current action step (if you have the appropriate permissions) by clicking on the '
Current action' icon associated to a record.
Workflow - Re-assign workflow action
To re-assign responsibility for the current step of the workflow attached to the selected record(s).
This option is available only if the selected record has a workflow action and you are authorised to update the Action step
The above actions (listed alphabetically for ease of reference) are only available for selection in the actions menu if you have the appropriate permissions to perform the action on the selected record(s) and the actions have been enabled for use by your RM Workflow administrator.
Tip: If any of the expected actions are not visible on your screen, your organisation may have determined that they are not required and your RM Workflow administrator may not have configured them to display.