All users, from their 'My groups' screen, accessed by clicking on the 'My groups' link in the Collaboration section of the left side navigation bar, can create new RM Workspace groups. When creating a new group, you can designate users and existing groups as administrators/members of your new group.
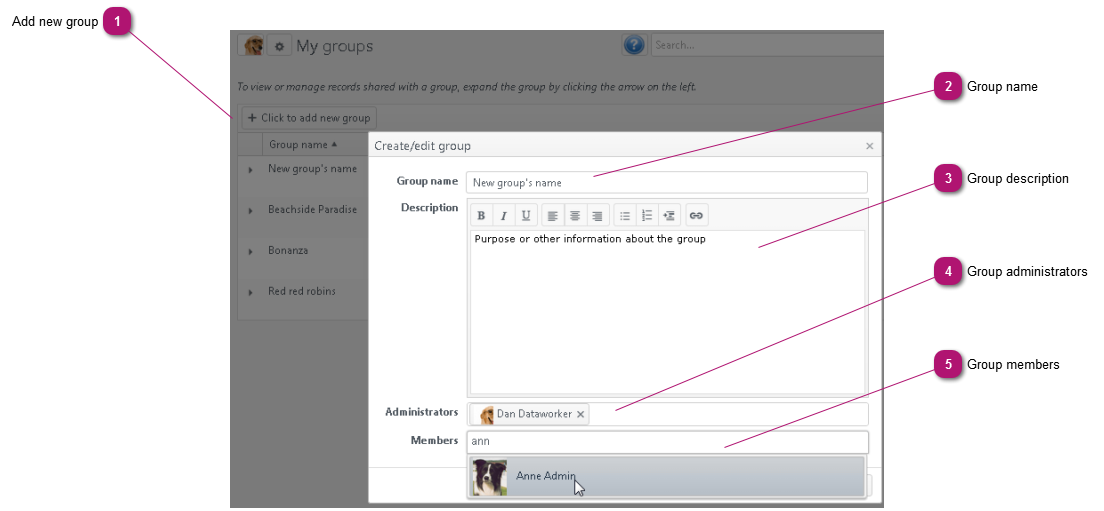
Add new group
In your My Groups screen, click this link to display the 'Create/edit group' pane.
By default, when you create a group, you are automatically set as an administrator of the group. However, groups can have multiple administrators - add them here.
Click in the' Administrators' field and enter the first few characters of a user's name or the name of an existing group (of which you are an administrator or member), to display a list of matching names from which to select the desired user(s)/group(s).
To add more names, simply repeat the previoius step.
The select box remains open enabling you to select multiple names. Click outside the select box to close it or click in the Administrators field and enter a new value to display new matching names.
To remove a name, simply click on the 'X' at the far right of the unwanted name.
Click in the 'Members' field and enter the first few characters of a user's name or the name of an existing group (of which you are an administrator or member), to display a list of matching names from which to select the desired user(s)/group(s).
To add more names, simply repeat the previoius step.
The select box remains open enabling you to select multiple names. Click outside the select box to close it or click in the Members field and enter a new value to display new matching names.
To remove a name, simply click on the 'X' at the far right of the unwanted name.
When you have completed your group's set up, just click on OK to save your new group or click Cancel to discard your changes and return to your 'My groups' screen.
Note: If you have added an existing group into either the Administrators or Members field, when you save your new group, the existing group names will be 'exploded' into their component users.
eg. If Group 1 has members User A and User B, and if you create Group 2 and Add Group 1 as a member of Group 2 - when you save Group 2, instead of displaying Group 1 as a member, the Member field will then show User A and User B.
Tip: To remove unwanted Administrators or Members, click on the 'X' to the right of the unwanted name