DragNdrop a file to create a new record
1. Using Windows Explorer, locate the file which is to be stored to HP TRIM/HPE RM as a new record.
Note: Due to browser limitations, you cannot drag an email or a file attached to an email directly from the email client to RM Workspace. You can drag the email or file from the email client to your desktop and from there you can drag it and drop it in RM Workspace to create a new record.
2. Click on the file and drag it to any area on RM Workspace which does not display records
-
This might be the navigation bar or the actions menu or a space in the body of the screen where no portlets and records are displayed
3. 'Drop' the file (unclick the mouse button)
4. In the bottom right of your screen, you may briefly see a pop up 'Document queue' window displayed, but it quickly disappears and is replaced in the centre of your screen with the 'Please select record type' window.
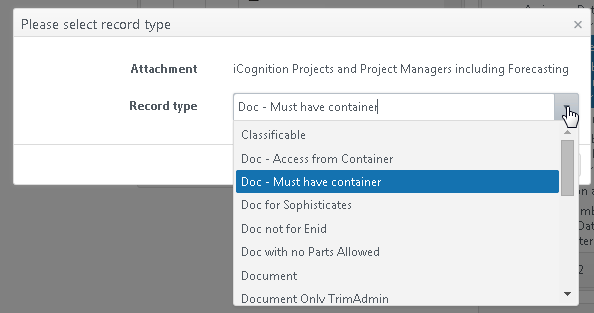
5. Accept the displayed default record type (if set) or select the desired record type for the new record in the Record type field then click on OK to proceed.
-
If you enter the first 3 characters or more of a record type name into this field, a list of matching record types will be automatically displayed, enabling you to select the one you want.
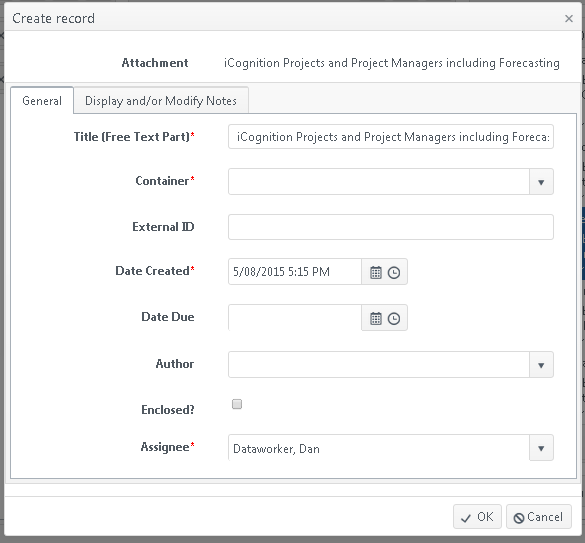
6. The Create record window is displayed.
7. Enter the required details for the new record
-
The fields and tabs displayed are those which are configured for the record type selected (subject to the limitations outlined below) and mandatory fields are indicated with a red asterisk.
8. RM Workspace has limitations on the tabs it is able to display on the Create record form. RM Workspace cannot display any of the HP TRIM/HPE RM standard page tabs other than the Thesaurus Terms and Notes tabs as detailed below:
-
RM Workspace will display any stock property or additional fields configured to display on the General tab and
-
Any custom tabs created by your HP TRIM/HPE RM administrator when maintaining the record type, can be displayed, with any stock property or additional fields configured to display on the custom tab
-
The 'Attached Thesaurus terms' and the 'Display and/or Modify Notes' tabs can be displayed.
9. Click on OK to proceed
10. A 'Create record success' notification is displayed, confirming the number and name of the new record. If the new record was attached to a container record in the Create record form, the success notification also confirms the record number and name of that container.
11. Click on OK to close the success notification.
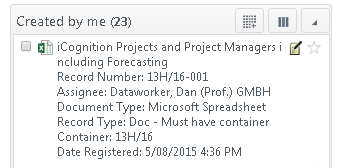
12. If you now review your 'Created by Me' portlet, the new record will be displayed at the top.
Tip: If you or an RM Workflow administrator have changed the default sort order of your 'Created by me' portlet, the new record may be displayed elswhere in the portlet.